安装之前请确保已安装wget, wget是一个从网络上自动下载文件的自由工具。
安装命令:
1
$ yum -y install wget
1.添加MySQL Yum Repository
1
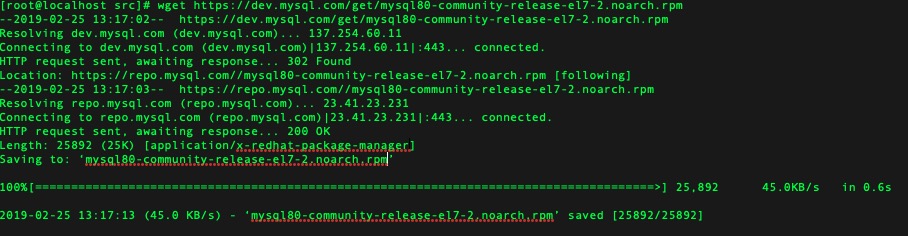
$ wget https://dev.mysql.com/get/mysql80-community-release-el7-2.noarch.rpm
可以看到进度:
然后检查是否已成功添加MySQL Yum Repository:
1
$ yum repolist enabled | grep "mysql.*-community.*"
2.选择MySQL版本号, 默认已经是最新版本, 这一步可以直接跳过
参考官方文档命令提示如下:
1
2
3
4
5
6
7
8
9
1.查看MySQL Yum Repository中的所有子存储库,并查看启用或禁用了哪些子存储库:
$ yum repolist all | grep mysql

2.如果您的平台支持 yum-config-manager,您可以通过发出这些命令来执行此操作,这些命令禁用5.7系列的子存储库并启用5.6系列的子存储库:
$ sudo yum-config-manager --disable mysql57-community
$ sudo yum-config-manager --enable mysql56-community

3.通过运行以下命令并检查其输出,验证是否已启用和禁用了正确的子存储库:
$ yum repolist enabled | grep mysql
也可以手动编辑mysql-community.repo文件:
1
$ vi /etc/yum.repos.d/mysql-community.repo
确保要安装版本enabled=1, 其他版本enabled=0如下图所示:
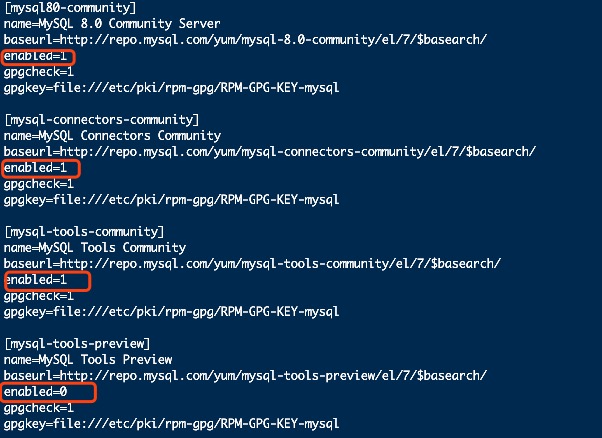
编辑完成按Esc + :wq 保存并退出编辑
*注意:
一旦在您的系统上启用了MySQL Yum存储库,yum update 命令的任何系统范围更新都将升级系统上的MySQL包,并且如果Yum在MySQL Yum存储库中找到它们的替换,也将替换任何本地第三方包。
我们通常可以在安装完成之后执行命令来卸载Yum Repository:
1
$ yum -y remove mysql80-community-release-el7-{version-number}.noarch
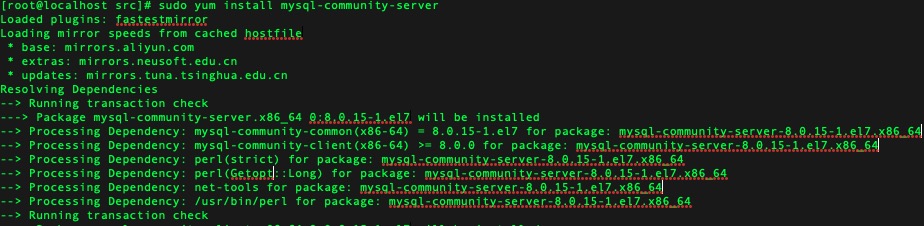
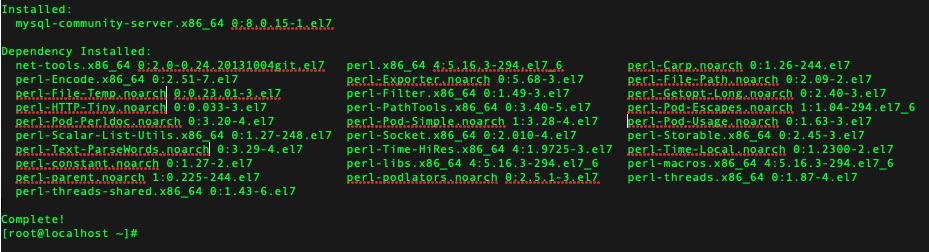
3.使用安装命令安装MySQL
1
$ yum install mysql-community-server
此时默认将会安装MySQL server(mysql-community-server)的包以及运行服务器所需组件的包,包括client(mysql-community-client)的包,客户端和服务器的常见错误消息和字符集(mysql-community-common)以及共享客户端库(mysql-community-libs)。 片刻之后会有一个提示, 输入y, 按回车, 然后会有一个漫长的等待过程, 直到安装成功。

4.启动MySQL服务器
1
$ sudo service mysqld start
如果出现:
Starting mysqld:[ OK ]
恭喜你启动成功!
也可以使用:$ sudo service mysqld status检查MySQL服务器状态
5.配置MySQL数据库
由于我操作时启动MySQL失败以下内容收集于网络,下边会列出失败原因
通过以下命令找到初始密码:
1
$ grep "password" /var/log/mysqld.log
初始用户:root@localhost
密码是初始用户名后的部分
然后使用命令
1
$ mysql -uroot -p
回车并输入密码, 之后会提示必须修改密码, 不要过于简单
mysql> ALTER USER ‘root’@’localhost’ IDENTIFIED BY ‘new password’:
密码设置规范:

设置开机自启动MySQL,使用以下命令:
1
2
3
4
5
6
7
8
9
10
11
12
#将服务文件拷贝到init.d下,并重命名为mysql
$ cp /usr/local/mysql/support-files/mysql.server /etc/init.d/mysqld

#赋予可执行权限
$ chmod +x /etc/init.d/mysqld

#添加服务
$ chkconfig --add mysqld

#显示服务列表
$ chkconfig --list

1
2
3
4
如果看到mysql的服务,并且3,4,5都是on的话则成功,如果是off,则键入

$ chkconfig --level 345 mysqld on
进行一些安全设置,以及修改数据库管理员密码
1
$ mysql_secure_installation
启动失败错误
当我尝试用$ sudo service mysqld start启动MySQL时提示错误信息:
1
Failed to start mysqld.service: Unit not found.

然后百度错误信息发现centos7内置的MySQL镜像已经放弃Oracle公司的MySQL,改用MySQL的分支数据库mariaDB。MariaDB数据库管理系统是MySQL的一个分支,主要由开源社区在维护,采用GPL授权许可 MariaDB的目的是完全兼容MySQL,包括API和命令行,使之能轻松成为MySQL的代替品。
MariaDB的API和协议兼容MySQL,另外又添加了一些功能,以支持本地的非阻塞操作和进度报告,所有使用MySQL的连接器、程序库和应用程序也将可以在MariaDB下工作。

所以解决方法就是安装MariaDB,命令:
1
$ yum install -y mariadb-server

然后,跟安装MySQL一样会等待很长一段时间, 安装完成后的样子:
安装完成后执行以下命令来启动:
1
$ systemctl start mariadb.service
很不幸,依然提示:
1
Failed to start mariadb.service: Unit not found.
万般百度搜索到的大多数解决方法都是:
1
$ yum install -y mariadb-server
但是到我这里是没用的,无奈只好选择把MySQL卸载试试(因为之前装了MySQL),然后重装一次mariadb。
卸载流程
i.检查安装的MySQL组件
1
& rpm -qa | grep -i mysql
可以查看到类似如下列表:

依次执行:$ rpm -ev 列表中的一个插件名称, 例如:
1
rpm -ev perl-DBD-MySQL-4.023-6.el7.x86_64
如果出现类似以下错误:
1
error: Failed dependencies: ************
解决办法:$ rpm -e --nodeps 列表中的一个插件名称,例如:
1
rpm -e --nodeps perl-DBD-MySQL-4.023-6.el7.x86_64
ii.删除MySQL对应的文件夹,执行:
1
2
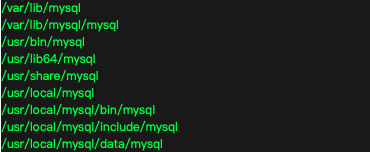
$ find / -name mysql
依次执行:
1
2
3
4
5
$ rm -rf /var/lib/mysql
$ rm -rf /var/lib/mysql/mysql
...
$ rm -rf /usr/local/mysql/include/mysql
$ rm -rf /usr/local/mysql/data/mysql
执行:
1
$ whereis mysql
如果显示有文件夹,则步骤跟上边一样, 依次执行:$ rm -rf 对应路径,删除即可。
iii.查看和删除MySQL用户及用户组,如下所示:
1
2
3
4
5
6
7
8
9
[root@localhost ~]# more /etc/passwd | grep mysql
mysql:x:998:1000::/home/mysql:/bin/bash
[root@localhost ~]# more /etc/shadow | grep mysql
mysql:!!:17438::::::
[root@localhost ~]# more /etc/group | grep mysql
mysql:x:501:
[root@localhost ~]# userdel mysql
[root@localhost ~]# groupdel mysql
groupdel: group 'mysql' does not exist
最后可以在执行一次查看下是否删除。
重新安装MariaDB
1
$ yum -y install mariadb mariadb-server
此时由于yum缓存中还存在MySQL,本次安装会省去大部分下载过程,稍等片刻即可安装完成:
1
2
3
4
5
6
7
8
9
[root@localhost ~]# yum –y install mariadb mariadb-server
Loaded plugins: fastestmirror
Loading mirror speeds from cached hostfile
 * base: centos.ustc.edu.cn
 * extras: centos.ustc.edu.cn
 * updates: centos.ustc.edu.cn
Resolving Dependencies
--> Running transaction check
安装结果:

安装完成MariaDB,首先启动MariaDB
1
$ systemctl start mariadb
添加到开机启动
1
$ systemctl enable mariadb
接下来进行MariaDB的相关简单配置
1
$ mysql_secure_installation
首先是设置密码,会提示先输入密码
1
Enter current password for root (enter for none):
注意此处由于是第一次运行,直接回车即可,否则会提示出错误:
1
ERROR 1045 (28000): Access denied for user 'root'@'localhost' (using password: YES)
直接回车后:
1
2
3
4
5
Enter current password for root (enter for none):
OK, successfully used password, moving on...

Setting the root password ensures that nobody can log into the MariaDB
root user without the proper authorisation.
会提示设置密码,输入y:
1
Set root password? [Y/n] y
输入新密码,会提示重新再输入一次:
1
2
3
4
5
New password:
Re-enter new password:
Password updated successfully!
Reloading privilege tables..
 ... Success!
出现的其他的一些配置:
是否删除匿名用户
1
2
3
4
5
6
7
8
By default, a MariaDB installation has an anonymous user, allowing anyone
to log into MariaDB without having to have a user account created for
them.  This is intended only for testing, and to make the installation
go a bit smoother.  You should remove them before moving into a
production environment.

Remove anonymous users? [Y/n] y
 ... Success!
是否禁止root远程登录
1
2
3
4
5
Normally, root should only be allowed to connect from 'localhost'.  This
ensures that someone cannot guess at the root password from the network.

Disallow root login remotely? [Y/n] n
 ... skipping.
是否删除test数据库
1
2
3
4
5
6
7
8
9
10
By default, MariaDB comes with a database named 'test' that anyone can
access.  This is also intended only for testing, and should be removed
before moving into a production environment.

Remove test database and access to it? [Y/n] y
 - Dropping test database...
 ... Success!
 - Removing privileges on test database...
 ... Success!
是否重新加载权限表
1
2
3
4
5
6
7
8
9
10
11
12
Reloading the privilege tables will ensure that all changes made so far
will take effect immediately.

Reload privilege tables now? [Y/n] y
 ... Success!

Cleaning up...

All done!  If you've completed all of the above steps, your MariaDB
installation should now be secure.

Thanks for using MariaDB!
MariaDB设置完成!
接下来测试登录
1
$ [root@localhost ~]# mysql -uroot -pYourPassword
例如我设置的密码是mypassword:
1
2
3
4
5
6
7
8
9
[root@localhost ~]# mysql -uroot -pmypassword
Welcome to the MariaDB monitor.  Commands end with ; or \g.
Your MariaDB connection id is 13
Server version: 5.5.60-MariaDB MariaDB Server
Copyright (c) 2000, 2018, Oracle, MariaDB Corporation Ab and others.

Type 'help;' or '\h' for help. Type '\c' to clear the current input statement.

MariaDB [(none)]>
可以看到已经登录成功!
配置MariaDB的字符集 编辑/etc/my.cnf文件
1
$ vi /etc/my.cnf
在[mysqld]标签下添加以下内容:
1
2
3
4
5
init_connect='SET collation_connection = utf8_unicode_ci'
init_connect='SET NAMES utf8'
character-set-server=utf8
collation-server=utf8_unicode_ci
skip-character-set-client-handshake
编辑/etc/my.cnf.d/client.cnf文件
1
$ vi /etc/my.cnf.d/client.cnf
在[client]标签下添加
1
default-character-set=utf8
编辑/etc/my.cnf.d/client.cnf文件
1
$ vi /etc/my.cnf.d/mysql-clients.cnf
在[mysql]中添加
1
default-character-set=utf8
之后重启MariaDB:
1
$ systemctl restart mariadb
然后通过命令:
1
$ mysql -u root -p
回车并输入密码, 可看到修改后的字符集:
1
2
3
4
5
6
7
8
9
10
11
12
13
14
15
16
17
18
19
20
21
22
23
24
25
26
27
28
29
30
31
32
33
34
35
[root@localhost ~]# mysql -u root -p
Enter password:
Welcome to the MariaDB monitor.  Commands end with ; or \g.
Your MariaDB connection id is 2
Server version: 5.5.60-MariaDB MariaDB Server

Copyright (c) 2000, 2018, Oracle, MariaDB Corporation Ab and others.

Type 'help;' or '\h' for help. Type '\c' to clear the current input statement.

MariaDB [(none)]> show variables like "%character%";show variables like "%collation%";
+--------------------------+----------------------------+
| Variable_name            | Value                      |
+--------------------------+----------------------------+
| character_set_client     | utf8                       |
| character_set_connection | utf8                       |
| character_set_database   | utf8                       |
| character_set_filesystem | binary                     |
| character_set_results    | utf8                       |
| character_set_server     | utf8                       |
| character_set_system     | utf8                       |
| character_sets_dir       | /usr/share/mysql/charsets/ |
+--------------------------+----------------------------+
8 rows in set (0.00 sec)

+----------------------+-----------------+
| Variable_name        | Value           |
+----------------------+-----------------+
| collation_connection | utf8_unicode_ci |
| collation_database   | utf8_unicode_ci |
| collation_server     | utf8_unicode_ci |
+----------------------+-----------------+
3 rows in set (0.00 sec)

MariaDB [(none)]>
设置结束!